Monday 10 January 2011

Colour lighting in maya


When the lighting and shadows were at a satisfactory stage, i started playing around with the colours of the lights. What's interesting is that colour can pretty much determine a mood of a scene. So for instance, blue lighting could represent cold and mellow where as a colour like orange could be warm and uplifting.

The process of changing the colours of the lights was easy but what was difficult was getting the right tone of colour and effect from the lights that were already placed in the scene.

Out of all the colour experimentation, blue seems to fit in really well. It just seems more natural looking colour in an office environment where as the other colours look a bit more extravagant. But maybe we need something extravagant since we are not going for a realistic look but more of a stylised feel and image.


More Lighting in maya and colour lighting


The moniter screen in maya needed to be lighted up so when the rigged character facing the computer is looking at it, the glow appears from the moniter and reflects into his face. I just selected the faces of the computer screen of the moniter and then just put a lambert glow texture onto the screen. So it gives the illusion that the moniter is glowing.


I just realised that my interior environments still needs to feel like an office and there are no lights on top of the ceiling. It needs some lights on the ceiling like it has in real offices. Plus i have decided to decrease the area lights down to one since the five i put there originally were not really nessesscary. So i scaled the one area light and filled up the whole room. Plus i put a spot light on top of the blocked out vending in machine down the hallway just to give focus on that character. I kept the volume light where it was.

I created the ceiling lights using some cylinders and then i duplicated a couple of them and spreaded them around on the top. Then i put in a couple of point lights into the cylinders because point lights are good for lighting bulbs and lamps. Plus i put a small area light into the moniter screen where the rigged character is facing just to give it more glow and brightness.
The lights needed some colour so briefly looked into the colour of the lights and just tweaked it to a little bit of blue. I will experiment with colour further on.


The results don't look bad but the intensity of the ceiling lights need to be lowered because its too strong and i always have trouble with that. I need to exeriment with the colours of lights too since that is going to be important giving it a mood and feel.


Further lighting in Maya


I've finally found something that may help my lighting problems in maya, specifically as to why the the scene always brightens too quickly everyhwhere. There is this feature in maya called the relationship editors and what i had to do is go the light section and what i can do now is choose the objects which i want the lights to be projected on and the ones that i do not want the lights to be projected on. This is great as it gives me more flexibility in trying to experiment with my lights and get it right.

The results look decent so far and the shadows are also looking good too. The character seems to be holding up well too.


Sunday 9 January 2011

Continuing lighting experiment


So i have been continuing with the lighting experiments and just recently have decided to download a pre - rigged model and put it in the scene. The reason for this is because i want to see how a potential character may look within the lights i am placing around in the scene.

I had to change up the lights and put in more different variety of lights because the area light was starting to become quite limited. I wasn't getting the right look. The rendered shots always seem to become too bright or too dark.


So i decided to put in a volume light and increase the size of it. The reason for doing that is because the light is being projected inside the volume light and so in order for it to have more of a significant effect in the scene i need to expand it outwards. As for the area lights, i still kept them in the scene but i also increased the size of the area lights and cut it down to 5 lights.


The results are getting better but its still doesn't look quite right to me and i am getting frustrated because all the tinkering and adjusting sometimes feels like it makes it look worse but i'm going to find a solution. The character within the scene also looks over lighted and shadows for some reason look really rough and jagged.

I don't know why the shadows of the character looks a little rough so i need to look into that.


Saturday 8 January 2011

Research on Lighting

As i am continuing with my lighting experiments, i've spent my spare time researching more about lighting. I've come across a few videos on the web about basic principles of lighting and what you have to take into consideration when doing the process of it.

Here are some interesting videos that i found


Thursday 16 December 2010

More lighting experiments in Maya


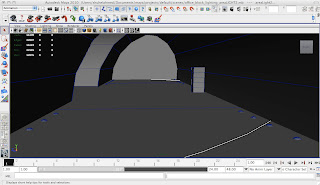
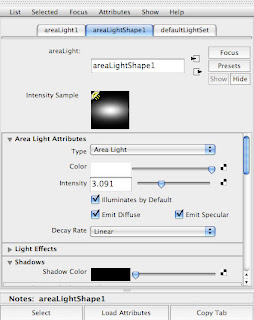
So i've been experimenting with the lights in Maya and the results have been mixed so far. I'm having difficulty in getting the brightness of the light right as well as forecasting the right sense of shadows in the scene. I guess i just have to keep tinkering with the lights till i get it right. I am using the are lights first since out of all the lights, i liked this one the best because of the direction the light is being projected in. So as can see in this pic below i am adjusting and increasing some settings for the area light because then i will render the shot and see if it has made the lighting any better.


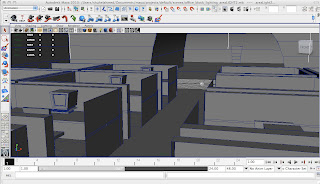
I also realised that in some cases, one light might not be enough. So for the area lights i decided to put in about 9 area lights and spread them around in the office room. Also i need to cover up and fill up the roof of the office so it isn't exposed because otherwise the lights might just go into inifinty without having to be blocked by some kind of boundaries.


So i've put in the roof and also finished up the complete blockout of the environment. I can start placing my lights without having the problem of an incomplete interior environment.


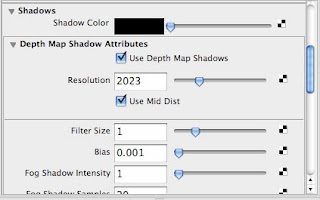
As i was placing the area lights around the scene, i knew that i would have to start thinking about the shadows since that is going to be really important and so i started experimenting with that in this scene. I'm using this feature called Depth Map Shadows since this will allow me to actually to see shadows in my scene coming from the opposing lights. There was this other feature called Ray Trace Shadows which was really good because it gives it more of a cleaner look but what i found out was that the rendering time was too long and so i decided to stick with depth map shadows because it took less time to render the shots and looked decent.

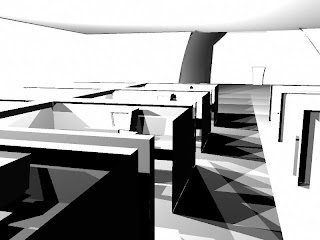
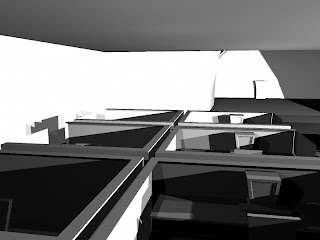
Here are the initial render shots which is not bad but it doesn't look right. The light is not strig enough and it looks a little dim. The shadows look great but maybe too strong

I increased the brightness of the area light and it has just made it worse. The scene looks literally so bright that i need to go back and decrease the intensity of the light.


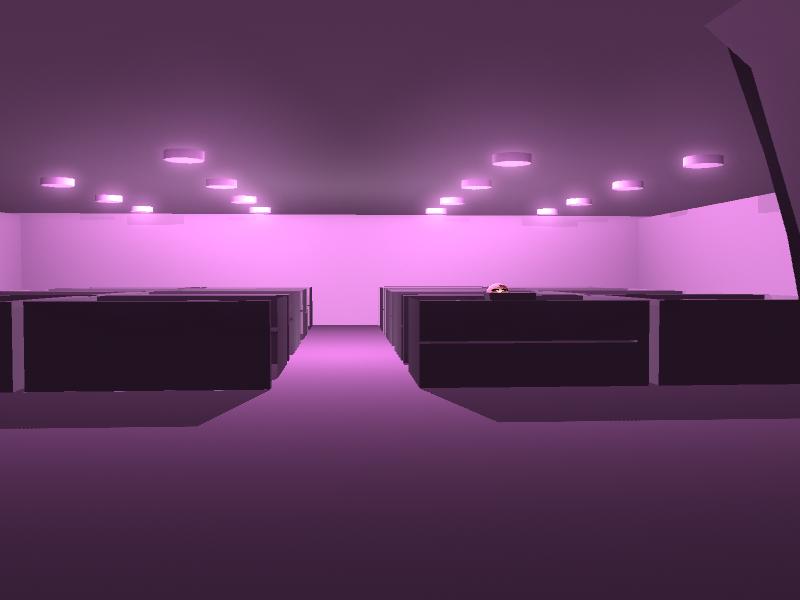
Its almost getting there in the rendered shots below but its become a little dull and pale, plus theres not the right balance of brightness of the area lights.


I went back to the settings and just increased a tad of the lighting and i also moved the area lights about in the scene to give it more of an even look.